Git Tips you (Possibly) Didn't Know You Needed
Although Git is a really powerful distributed source control system, it is far from intuitive. Getting the most out of it often means learning obscure Terminal commands and option flags. These tips distill some of the weird incantations that have helped me to improve my Git workflow over the years.
If you don’t know what Git is or want to understand it better, I would highly recommend checking out Alice Bartlett’s excellent Git for humans slides.
Warning: Terminal required
These tips are aimed at folks who work with Git using the command line. That said I would like to think that those who use a graphical interaface may also find them useful.
1. Run the latest version of Git
This one seems almost too obvious to mention. That said, Git is constantly being updated with new features, bug fixes and performance enhancements and it pays to be running the latest version. At the very least, make sure you are running version 2 or above, as this introduced a number of important improvements and enhancements to the default behaviour. Download the latest Git from the Git website, or update it using your package manager of choice.
2. Git Completion in your Terminal
There’s a great bash script that adds tab-completion to Git commands, options, tags, and branch. I’m always creating branches with long names, and being able to tab-complete them is very handy. There’s versions for Z shell and tsch available too.
3. Interactively stage changes with --patch
Keeping a clean and atomic commit history is a good habit to get into. It makes reviewing code simpler, rolling back changes less painful, and writing focused, useful commit messages easier. But sometimes our fingers get ahead of us and we end up with a bunch of unrelated changes in a file that really should be added as separate commits.
  $ git diff
  diff --git a/app/views/layouts/application.html.erb b/app/views/layouts/application.html.erb
  index 0b9d83d..85af2e2 100644
  --- a/app/views/layouts/application.html.erb
  +++ b/app/views/layouts/application.html.erb
  @@ -3,7 +3,7 @@
   <head>
     <meta charset="utf-8">
     <meta http-equiv="X-UA-Compatible" content="IE=edge,chrome=1">
  -  <title><%= yield :meta_title %></title>
  +  <title><%= yield :meta_title || 'North West Ruby User Group' %></title>
     <meta name="description" content="<%= yield :meta_description %>">
     <meta name="viewport" content="width=device-width, initial-scale=1">
     <link rel="apple-touch-icon" sizes="180x180" href="/apple-touch-icon.png">
  @@ -73,34 +73,6 @@
       </div>
     </div>

  -   <script>
  -    var navigation = responsiveNav(".nav-collapse", {
  -      animate: true,                    // Boolean: Use CSS3 transitions, true or false
  -      transition: 284,                  // Integer: Speed of the transition, in milliseconds
  -      label: "Menu",                    // String: Label for the navigation toggle
  -      insert: "after",                  // String: Insert the toggle before or after the navigation
  -      customToggle: "",                 // Selector: Specify the ID of a custom toggle
  -      closeOnNavClick: false,           // Boolean: Close the navigation when one of the links are clicked
  -      openPos: "relative",              // String: Position of the opened nav, relative or static
  -      navClass: "nav-collapse",         // String: Default CSS class. If changed, you need to edit the CSS too!
  -      navActiveClass: "js-nav-active",  // String: Class that is added to <html> element when nav is active
  -      jsClass: "js",                    // String: 'JS enabled' class which is
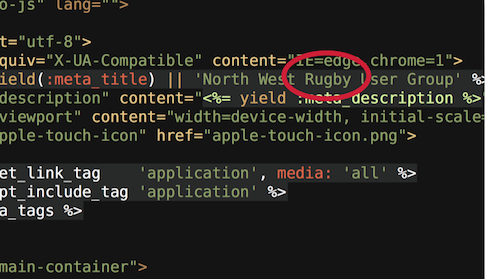
In these situations, the git add --patch command (or git add -p for
short) is incredibly useful. It moves through “hunks” of changes one by one,
allowing you to make a decision as to whether to stage each change in turn:
  $ git add --patch

  diff --git a/app/views/layouts/application.html.erb b/app/views/layouts/application.html.erb
  index 0b9d83d..85af2e2 100644
  --- a/app/views/layouts/application.html.erb
  +++ b/app/views/layouts/application.html.erb
  @@ -3,7 +3,7 @@
   <head>
     <meta charset="utf-8">
     <meta http-equiv="X-UA-Compatible" content="IE=edge,chrome=1">
  -  <title><%= yield :meta_title %></title>
  +  <title><%= yield :meta_title || 'North West Ruby User Group' %></title>
     <meta name="description" content="<%= yield :meta_description %>">
     <meta name="viewport" content="width=device-width, initial-scale=1">
     <link rel="apple-touch-icon" sizes="180x180" href="/apple-touch-icon.png">

  Stage this hunk [y,n,q,a,d,j,J,g,/,e,?]?
Hitting y will stage the displayed change; hitting n will skip it, leaving
it unstaged ready for a future commit.
There are additional options you can choose for each hunk and hitting ? will
show them all. For example, the s option can be used to split the current
hunk into even smaller ones.
4. Amend the most recent commit with --amend
If you ever find yourself having to amend the most recent commit, then you
will find git commit --amend useful. Rather than creating a new commit, it
merges the staged changes into the previous commit. It opens your editor with
the previous commit message so you can also edit it.
I often find that I’m amending the same commit as I refactor my code and don’t
need to change the commit message. In these situations, there’s an additional
flag that is useful: --reuse-message, or -C for short, which lets you
specify a commit SHA for the message you want to use. So the following command
will amend the previous commit in one step, keep the same commit message:
$ git commit --amend -C HEADI do this so often that I’ve created a git alias (see tip 7) for it called
amend:
$ git config --global alias.amend 'commit --amend -C HEAD5. Rewriting history with interactive rebase
This is possibly my favourite git trick and is a really powerful way to keep a clean git history. Say you’ve spotted a typo or found a bug that was introduced in a recent commit on your local branch and you want to fix it.
The problem is, you’ve made additional commits since, so you can’t use git
commit --amend as the commit you want to change isn’t the most recent one.
Now you could simply create a new commit that fixes the issue and move on. But that wouldn’t make for a very clean git history.
  $ git log --pretty=oneline -n3
  04fcdd05382d84438c7f37326f6899f903355be7 (HEAD -> messin) Correct tyop
  bd4aa76722b58d6b7d878208b2c629f5a6f3f48e Don't inline JavaScript for responsive navigation
  3aeecfa992f1dc4e8e8f8eb271564f258a5b465a Add a default page meta title
As long as the commits are only on your local branch and haven’t been remotely
shared with others, it makes sense to rewrite these commits so that the typo
never existed. To do this more complex commit rewriting, you can use git
rebase --interactive, or git rebase -i for short.
The interactive rebase command lets you to interactively rewrite your commits,
reordering and merging them as you see fit. To use it, call the command with
the revision you want to rebase to. For example, if you wanted to change the
last three commits, you can call git rebase -i HEAD~3. I often
find it easiest to simply rebase as far back as the branch I branched from,
which is usually master: git rebase -i master. Running this command will
give you a list of the commits in your editor that looks something like this:
  pick f682d4c Add a default page meta title
  pick a15516e Don't inline JavaScript for responsive navigation
  pick ec2898c Fix typo

  # Rebase 49ddbc8..ec2898c onto 49ddbc8 (3 commands)
  #
  # Commands:
  # p, pick = use commit
  # r, reword = use commit, but edit the commit message
  # e, edit = use commit, but stop for amending
  # s, squash = use commit, but meld into previous commit
  # f, fixup = like "squash", but discard this commit's log message
  # x, exec = run command (the rest of the line) using shell
  # d, drop = remove commit
  #
  # These lines can be re-ordered; they are executed from top to bottom.
  #
  # If you remove a line here THAT COMMIT WILL BE LOST.
  #
  # However, if you remove everything, the rebase will be aborted.
  #
  # Note that empty commits are commented out
To rewrite this commit history, we can edit the file, reordering the commits
and changing the commands as necessary. So in this case, we can move the line
representing most recent commit with the typo fix so that it sits below the
first commit, then change the command to fixup, telling Git to squash the
typo commit into the previous one. We end up with a file that looks like this:
  pick f682d4c Add a default page meta title
  fixup ec2898c Fix typo
  pick a15516e Don't inline JavaScript for responsive navigation

  # Rebase 49ddbc8..ec2898c onto 49ddbc8 (3 commands)
  #
  # Commands:  # p, pick = use commit
  # r, reword = use commit, but edit the commit message
  # e, edit = use commit, but stop for amending
  # s, squash = use commit, but meld into previous commit
  # f, fixup = like "squash", but discard this commit's log message
  # x, exec = run command (the rest of the line) using shell
  # d, drop = remove commit
  #
  # These lines can be re-ordered; they are executed from top to bottom.
  #
  # If you remove a line here THAT COMMIT WILL BE LOST.
  #
  # However, if you remove everything, the rebase will be aborted.
  #
  # Note that empty commits are commented out
Saving and closing the file will trigger the rebase command to rewrite history, leaving us with a clean two-commit history minus the “fix typo” commit. You can learn more about rewriting history in the Rewriting History section of the Pro Git book.
6. Rewriting history redux: --fixup & --autosquash
Fixing a previous commit in this way is something I find myself doing often.
Turns out there is an even easier way to perform this kind of commit
rewriting using the --fixup and --autosquash flags.
Firstly, when make the commit that fixes the issue, include the --fixup
option and pass in the SHA reference for the commit you want to fix against:
  $ git commit --fixup f682d4c
  [git-demo 7643c3b] fixup! Add a default page meta title
   1 file changed, 1 insertion(+), 1 deletion(-)
This creates a special commit with a commit message prefixed with “fixup!”,
which gives Git a clue that this is a fixup commit. Then when we call rebase,
we call it with the --autosquash option:
$ git rebase -i --autosquash HEAD~This time when the editor is opened, the commits will already be reordered and
the fixup commit will already be marked as fixup. You can simply save
the file and close the editor without having to make any changes and the
rebase will complete as before.
There’s even a way to configure your Git so that it will --autosquash by
default if it sees the “fixup!” prefix when you interactively rebase:
$ git config --global rebase.autosquash tru7. My favourite Git aliases
Git aliases are a great way to make helpful command and option combinations easier to type and remember. Here are some I find useful:
$ git config --global alias.co checkoutA simple one that saves you a few key strokes; now you can type git co
instead of git checkout.
$ git config --global alias.cm 'commit --verbose'The --verbose option makes Git include the diff of the current set of
changes at the bottom of the commit message template, which is a useful way to
sanity check the changes and also helps me write better commit messages as I
can see the changes right there in my editor as I write.
$ git config --global alias.amend 'commit --amend -C HEAD'As mentioned in Tip 5, this lets you update the previous commit with the currently staged changes in a single command.
$ git config --global alias.pretty 'log --pretty=oneline'With this, git pretty outputs a simpler one-line-per-commit log output.
  $ git config --global alias.upstream '!git push \
    --set-upstream origin $(git rev-parse --abbrev-ref HEAD)'
This is probably my favourite – it means you can push your local branch to the
remote origin and set the remote as upstream with git upstream.
8. Get yourself a global Git ignore file
A helpful thing to do is configure yourself a global .gitignore file. You
can use this file to list ignore rules that will apply across all your Git
repositories. This is a good way to globally ignore files that are specific
only to you and your system, for example Vim swap files, Pow
configuration files or Guard files. That way
you can avoid littering your application’s .gitignore file with entries that
might not be relevant to other developers or to the application itself.
Create a .gitigore file in your home directory and register it with the
following command:
git config --global core.excludesfile ~/.gitignore9. Configure your colours
Whilst Git colours some of its outputs by default, it’s possible to configure
the colours to suite your tastes. I like to tweak the output of the status
command to give a more intuitive colour output by adding the following to
.gitconfig:
  [color "status"]
  changed = yellow
  added = green
  untracked = cyan
Frustratingly there isn’t currently a way to distinguished between new untracked files from deleted ones in the colour options. If there was then I would most definitely configure deleted files to be coloured red.
10. Read flippin’ the manual
I’ve only really scratched the surface with these tips and I can thoroughly recommend browsing through the official documentation website. Not only is it a complete reference of Git, it also includes discussions and additional information that you won’t find in the man pages. You’ll also find the entirety of the Pro Git book by Scott Chacon and Ben Straub on the website, which is a fantastic way to level up your Git skills.
Bonus tip: jumping between branches
A quick bonus tip: in the same way cd - will take you to the previous
directory you were in, git co - will checkout the previous branch you were
on. I find this useful for jumping back and forth between two branches.
Bonus tip 2: Using reflog to recover lost commits
I was going to include a tip about git reflog, but Graham Ashton
has already done a great writeup on using reflog to unearth lost commits.
That’s all folks
Hopefully I’ve shared at least one thing that was new to you and will help you improve your Git workflow. I’m always looking to get better at Git. If you have anything interesting that you’d like to share, hit me up on Twitter.